


Posted by Faroo Pets Grooming
on June 08, 2026

TL;DR:
- Proper cat ear cleaning involves gentle inspection, application of a vet-approved solution, massage, and careful wiping to maintain ear health. Regular inspection and cleaning only when necessary help prevent infections and reduce owner anxiety, with professional support recommended for resistant or problematic cases. Using proper supplies, avoiding over-cleaning, and rewarding your cat foster a safe, effective maintenance routine that promotes overall ear health.
Effective cat ear cleaning is a simple routine involving inspection, application of a vet-approved cleaning solution, gentle massage, and careful wiping to maintain ear hygiene and catch potential health issues early. Veterinarians refer to this process as routine otic maintenance, and when done correctly at home, it keeps your cat comfortable and helps you spot early signs of infection before they become serious. This guide covers everything you need: the right supplies, a clear step-by-step process, common mistakes to avoid, and how often to clean. Whether your cat is a first-timer or a seasoned grooming veteran, you will finish this guide feeling confident and prepared.
What supplies do you need for safe cat ear cleaning?
Gathering the right tools before you start makes the entire process calmer for both you and your cat. The most critical item is a vet-approved ear cleaner formulated specifically for cats. Never substitute dog ear cleaners or human products. The pH balance and ingredient profiles differ enough to cause irritation in your cat’s sensitive ear canal.
Here is what to have ready before you begin:
- Vet-approved cat ear cleaning solution (ask your vet for a brand recommendation or check with a certified groomer)
- Cotton balls or gauze pads for wiping visible debris
- A clean, soft towel to wrap your cat if needed
- High-value treats your cat loves, to reward calm behavior
- Optional: disposable gloves for hygiene
Your environment matters just as much as your supplies. Choose a quiet room with good lighting. If your cat tends to squirm, ask a family member or friend to help hold them gently. Avoid cleaning right after a meal or when your cat is already agitated. A calm cat means a safer and more effective cleaning session.
One often-overlooked step is temperature. Warming the solution on a cotton ball before applying it directly reduces the shock of cold liquid in a sensitive ear. Cold solution can startle even the most relaxed cat and turn a smooth session into a struggle.
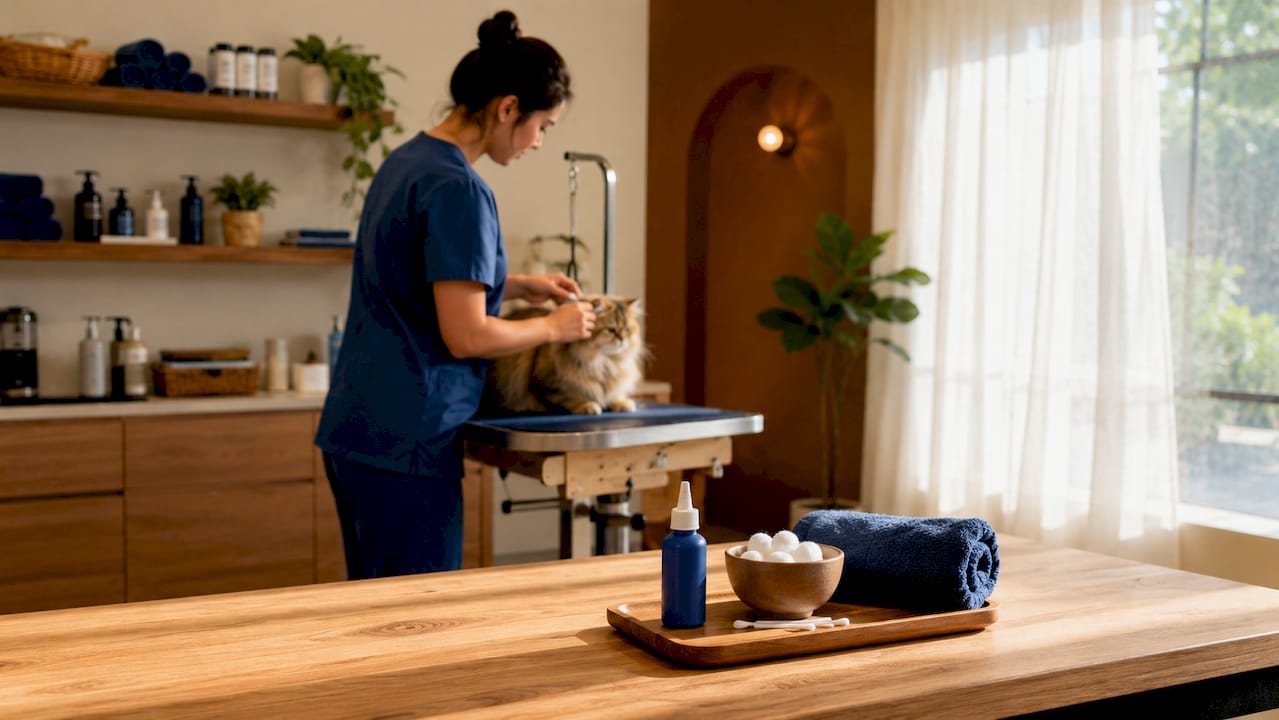
Pro Tip: Run the closed bottle of ear cleaner under warm water for 60 seconds before use. This simple step makes a real difference in how your cat responds.
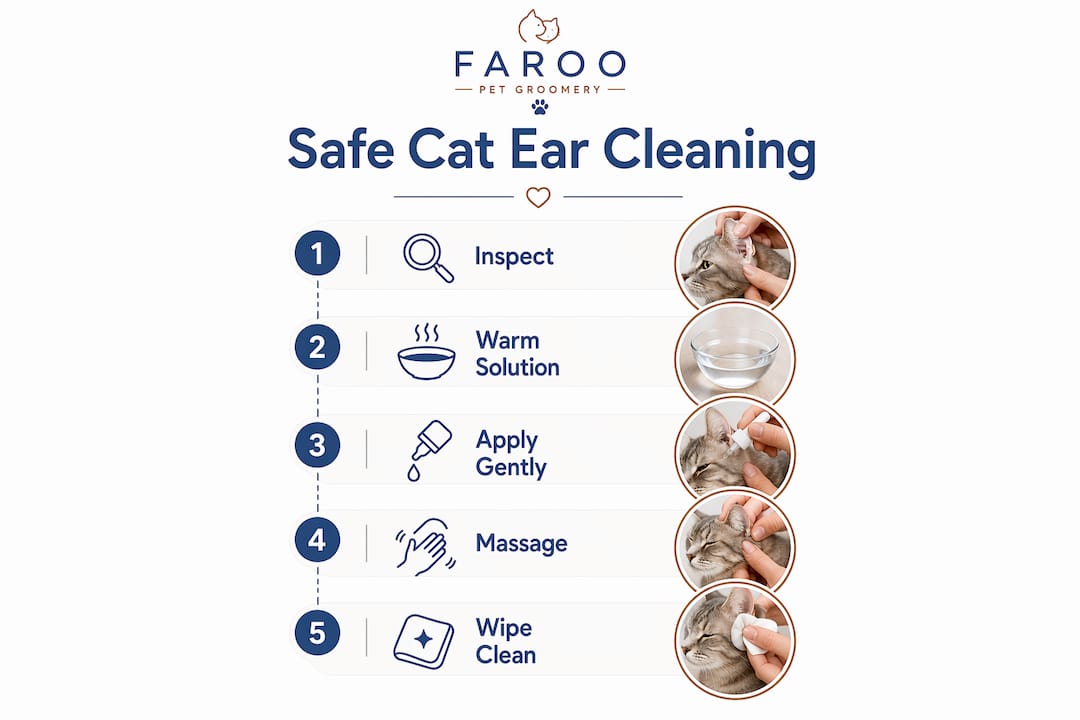
Step-by-step cat ear cleaning walkthrough
This is the core of the process. Follow each step in order and take your time. Rushing is the most common reason home ear cleaning goes wrong.
-
Inspect both ears first. Gently fold back each ear flap and look inside. A healthy ear is pale pink, odor-free, and has minimal wax. If you see redness, swelling, dark discharge, or smell something unpleasant, stop. These are signs of infection or ear mites, and cleaning infected ears at home can push debris deeper and worsen the problem. Call your vet instead.
-
Position your cat securely. Sit on the floor or a low surface with your cat in your lap or on a stable table. Hold the ear flap gently but firmly between your thumb and forefinger, folding it back to expose the ear canal opening. If your cat is very resistant, wrap them snugly in a towel, leaving only the head exposed.
-
Apply the cleaning solution. Hold the bottle tip just at the entrance of the ear canal without inserting it. Squeeze enough solution to fill the canal visibly. Purina recommends applying the cleaner carefully and avoiding pushing the applicator tip deep into the canal, which can cause trauma or push debris further in.
-
Massage the ear base. With the ear flap still folded back, use your thumb and forefinger to gently massage the base of the ear for 20 to 30 seconds. You will hear a soft squishing sound. This loosens wax and debris from the canal walls and moves it toward the outer ear where you can safely reach it.
-
Let your cat shake. Release your cat’s head and allow them to shake. This natural reflex expels loosened debris and excess solution from the canal. Minimal effective intervention is the guiding principle here. The shake does most of the work for you.
-
Wipe only what you can see. Use a cotton ball or gauze pad to gently wipe the visible parts of the ear canal and the inner ear flap. Never insert cotton balls, cotton swabs, or any object deeper than your first knuckle. Wiping only the visible area removes the loosened debris without risking damage to the eardrum.
-
Reward your cat. Give a treat immediately after each ear. Positive reinforcement builds a positive association with the process, making future sessions easier. Short breaks between ears help keep your cat relaxed.
-
Repeat on the other ear. Before moving to the second ear, wipe the tip of the solution bottle with a clean cloth. Cross-contamination between ears is a real risk. Bacteria or yeast from one ear can transfer to the other through the bottle tip, spreading infection rather than preventing it.
-
Apply medicated drops if prescribed. If your vet has prescribed ear medication, apply it after cleaning. Medicated drops work best in a clean ear canal because debris and wax reduce absorption. Always follow your vet’s dosage instructions.
Pro Tip: If your cat resists strongly at step two or three, stop and try again the next day. One ear per session is perfectly fine. Forcing the process creates lasting anxiety and makes every future attempt harder.
Common mistakes that can harm your cat’s ears
Most home ear cleaning errors come from using the wrong products or pushing too far. Cupertino Animal Hospital specifically warns against cotton swabs, hydrogen peroxide, rubbing alcohol, and vinegar. These substances either push debris deeper, strip natural oils, or cause chemical irritation in the delicate ear canal tissue.
Watch for these specific pitfalls:
- Using cotton swabs: The shape and rigidity of a cotton swab makes it easy to accidentally push wax deeper or damage the eardrum.
- Cleaning when infection is present: Redness, swelling, odor, or visible pain are signals to stop and call your vet. Home cleaning cannot treat infection and may delay proper diagnosis.
- Over-cleaning: Cleaning only when needed protects the natural oils and microbiome of the ear. Cleaning on a rigid weekly schedule regardless of actual wax buildup strips these protective elements.
- Skipping the cross-contamination step: Always wipe the bottle tip between ears.
- Forcing a resistant cat: Stress makes the experience traumatic. A cat that associates ear cleaning with fear will become harder to handle over time.
If your cat cries out, pulls away sharply, or shows signs of pain during cleaning, stop immediately. Pain during ear cleaning is not normal and signals a condition that requires veterinary examination. In some cases, veterinary cleaning under sedation is the safest option for cats with heavy discharge or severe discomfort.
How often should you clean your cat’s ears?
The honest answer is: it depends on your individual cat. Merck Veterinary Manual advises against routine cleaning for healthy cats, recommending inspection instead and prompt veterinary exams if anything changes. This is a meaningful distinction. Inspection and cleaning are not the same thing.
The table below gives a practical framework based on your cat’s ear health profile:
| Cat profile | Recommended approach |
|---|---|
| Healthy cat, no wax buildup | Inspect every 1 to 2 weeks; clean only when visible debris is present |
| Cat prone to wax buildup or allergies | Inspect every 1 to 2 weeks; clean monthly or as directed by your vet |
| Cat with a history of ear infections | Follow your vet’s specific schedule; do not self-manage without guidance |
| Senior or immunocompromised cat | More frequent inspection; defer cleaning decisions to your vet |
Building a habit of regular inspection is the real goal. When you know what your cat’s ears look like on a normal day, you will immediately notice when something changes. That early detection is what prevents minor wax buildup from becoming a full ear infection.
Pro Tip: Take a quick photo of your cat’s ears during a healthy inspection. Having a visual baseline makes it much easier to spot subtle changes over time.
Key takeaways
Safe, effective cat ear cleaning requires inspection first, a vet-approved solution, gentle massage, and wiping only visible areas to protect ear tissue and prevent infection.
| Point | Details |
|---|---|
| Inspect before you clean | Check for redness, odor, or discharge before applying any solution; stop if infection signs are present. |
| Use vet-approved products only | Cat-specific ear cleaners protect the ear’s natural pH; avoid hydrogen peroxide, vinegar, and alcohol. |
| Massage and let the cat shake | Massaging the ear base and allowing head shaking does most of the cleaning work safely. |
| Clean only when needed | Over-cleaning strips natural oils; inspect every 1 to 2 weeks and clean only when debris is visible. |
| Wipe the bottle tip between ears | This one step prevents cross-contamination and reduces the risk of spreading bacteria or yeast. |
Why I think most cat owners overcomplicate this
Here is what years of watching pet owners interact with their cats has taught me: the biggest barrier to good ear hygiene is not technique. It is anxiety. Owners either avoid ear cleaning entirely because they are afraid of hurting their cat, or they over-clean because they feel like they should be doing something regularly.
The Merck Veterinary Manual’s guidance that healthy cats do not need routine cleaning is genuinely liberating once you accept it. Your job is not to clean on a schedule. Your job is to look, assess, and act only when the ear tells you it needs attention.
Positive reinforcement is also underrated in this context. Cats that receive treats during and after ear handling from kittenhood accept grooming far more readily as adults. If you have an adult cat who resists, start with just touching the ears for a few days, rewarding each time, before introducing solution. Patience here pays off for years.
My honest recommendation is to pair home inspection with professional grooming at least twice a year. A trained groomer or vet tech sees things you might miss and can flag early changes before they escalate. Home care and professional care are not competing options. They work best together. For a broader look at keeping your cat healthy and well-groomed, the cat grooming tips on the Faroopets blog are a solid starting point.
— Growth
Let Faroopets handle the tricky parts for you

Some cats simply will not cooperate with home ear cleaning, and that is completely normal. At Faroopets, our certified groomers are trained to handle even the most anxious cats with calm, gentle techniques that minimize stress and maximize results. Our mobile grooming vans come to your door in Dubai, fully sanitized and stocked with vet-approved products. Every session includes a thorough ear inspection and cleaning as part of our luxury cat grooming service. If your cat has chronic ear issues or you simply want the peace of mind that comes with professional care, book your grooming session today and let us take care of the details.
FAQ
What is the safest ear cleaner for cats?
The safest option is a vet-approved cat-specific ear cleaning solution, such as those recommended by your veterinarian or certified groomer. Avoid hydrogen peroxide, alcohol, and vinegar, as these cause irritation and damage to the ear canal.
How do I know if my cat’s ears need cleaning?
Look for visible wax buildup, mild odor, or light debris when you fold back the ear flap. If the ear looks pink and clean with no odor, no cleaning is needed at that time.
Can I use cotton swabs to clean my cat’s ears?
No. Cotton swabs push debris deeper into the ear canal and risk damaging the eardrum. Use cotton balls or gauze pads to wipe only the visible outer areas of the ear.
When should I take my cat to the vet instead of cleaning at home?
Take your cat to the vet if you notice redness, swelling, dark or heavy discharge, a strong odor, or if your cat shows pain when the ear is touched. These signs indicate infection or ear mites that require medical treatment, not home cleaning.
How often should I inspect my cat’s ears?
Inspect your cat’s ears every one to two weeks as a general rule. Cats prone to wax buildup or allergies may need more frequent checks, with cleaning frequency guided by your vet.
